Introduction
I’m going to look at the basic steps required for setting up an Office 365 tenant. There are a few ways you can purchase Office 365. There’s the good old credit card on a monthly subscription, bought directly from Microsoft. This is the most expensive way to buy Office 365 as you will be paying Recommended Retail Price (RRP). Then there are purchasing models typically bought from an IT reseller. The reseller typically either helps add the subscription to an existing Microsoft Enterprise agreement with licenses available on a Microsoft volume license portal, or more likely the reseller will be what’s known as a cloud solution provider (CSP). CSP licensing can be bought on monthly or yearly commitments, with prices lower than RRP. The CSP model offers great flexibility as it’s easy to increase or decrease license consumption on a monthly basis, thus you’re never overpaying for your Office 365 investment. Now you may be reading this wondering what on earth is a Microsoft Office 365 Tenant? Don’t worry—you’re not alone. Although Office 365 adoption is high, I saw a statistic that something like one in five IT users use Office 365. That’s still only 20% market saturation. In basic terms, an Office 365 tenant is the focal point from where you manage all the services and features of the Office 365 package. When creating an Office 365 tenant portal, you need a name for the tenant, which will make up a domain name with something like yourcompanyname.onmicrosoft.com. At a minimum, the portal will incorporate a version of Azure Active Directory for user management. Once licenses have been assigned to the users, options are open for using services like Exchange Online for email, SharePoint Online for Intranet and document library-type services, OneDrive for users’ personal document storage, and one of Microsoft’s key plays at the moment, Teams. Teams is the central communication and content collaboration platform bringing much of the Office 365 components together into one place.Cool, Now What?
Setting up your own Office 365 portal may seem like a daunting task, but it doesn’t have to be. I’ll walk you through the basics below. At this point, I must point out I work for a cloud solution provider, so I’ve already taken the first step in creating the Microsoft tenant. You can do this any way you want—I outlined the methods of payment above. However you arrive at this point, you’ll end up with a login name like admin@yourcompanyname.onmicrosoft.com. You need this to access the O365 portal at https://portal.microsoft.com. When you first login, you’ll see something like this. Click on Admin.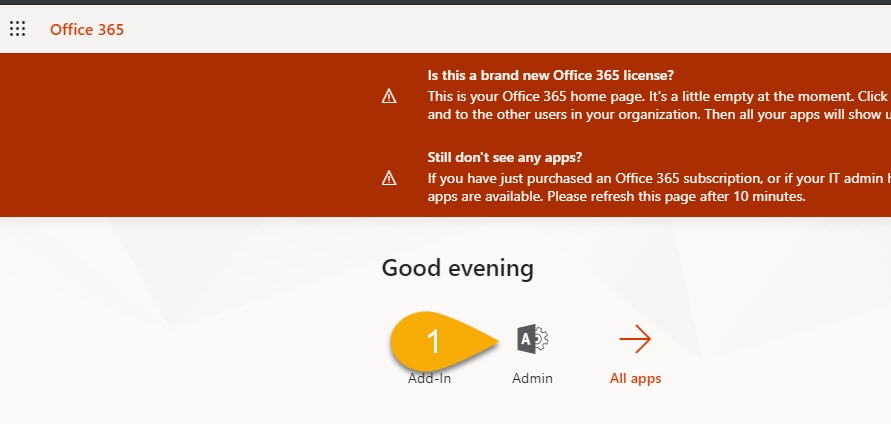 The admin panel looks like this when you first log in.

Domain Verification
Select Setup and add a domain. Here we’ll associate your mail domain with the O365 portal.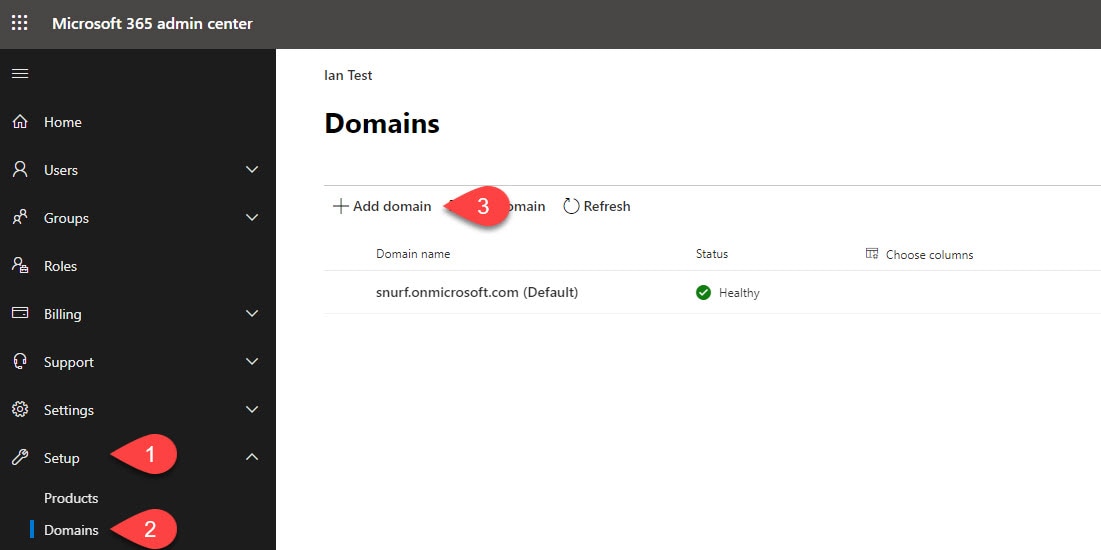 I’m going to add and verify the domain snurf.uk. This O365 portal will be deleted before this article is published.
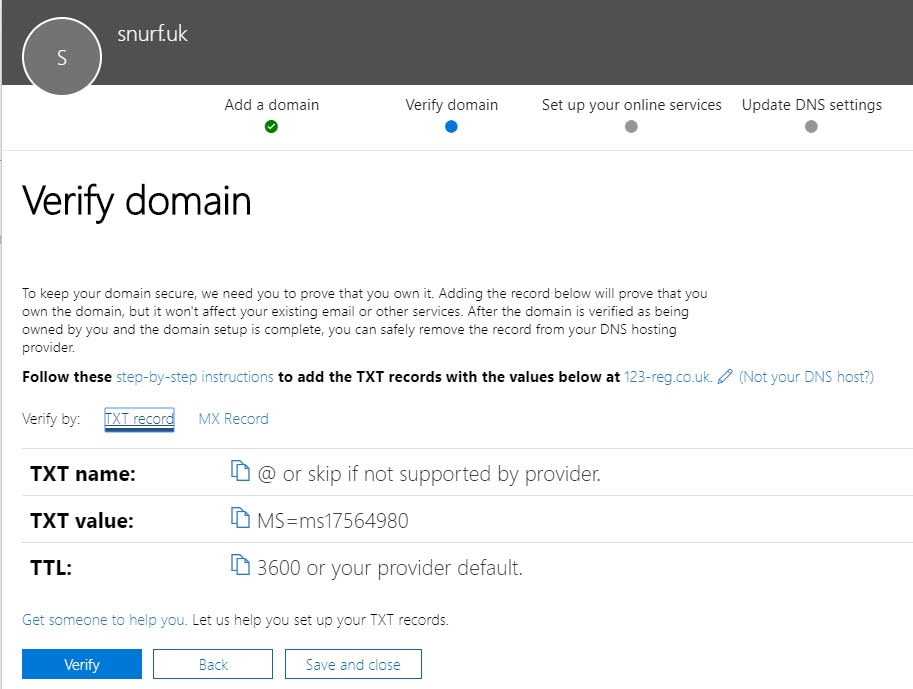
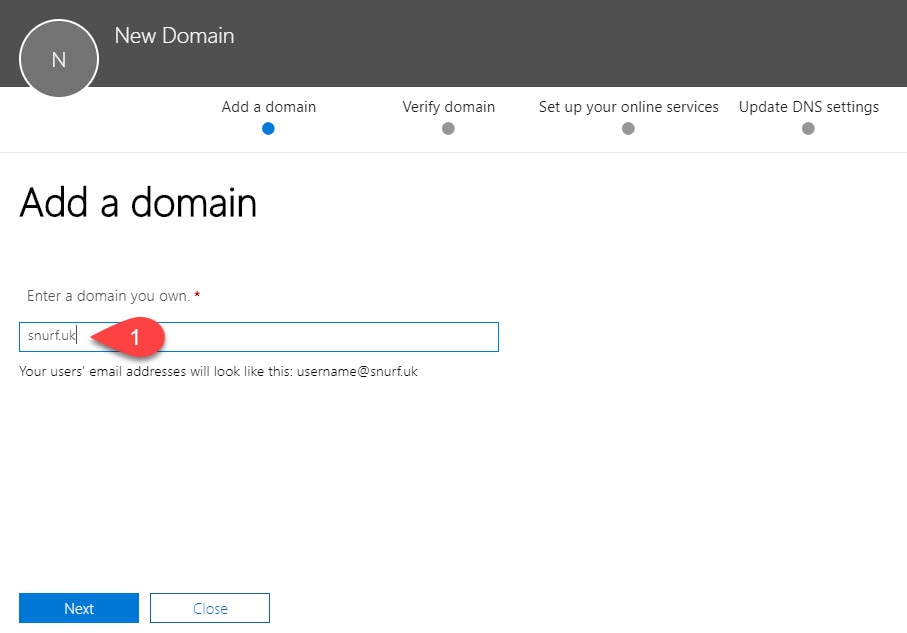 At this point, you must prove you own the domain. My domain is hosted with 123-reg. I could at this point log in to 123-reg from the O365 portal and it would sort out the domain verification for me. I’ll manually add a TXT record to show what’s involved.
 To verify the domain, I have to add a TXT DNS record with the value specified below.
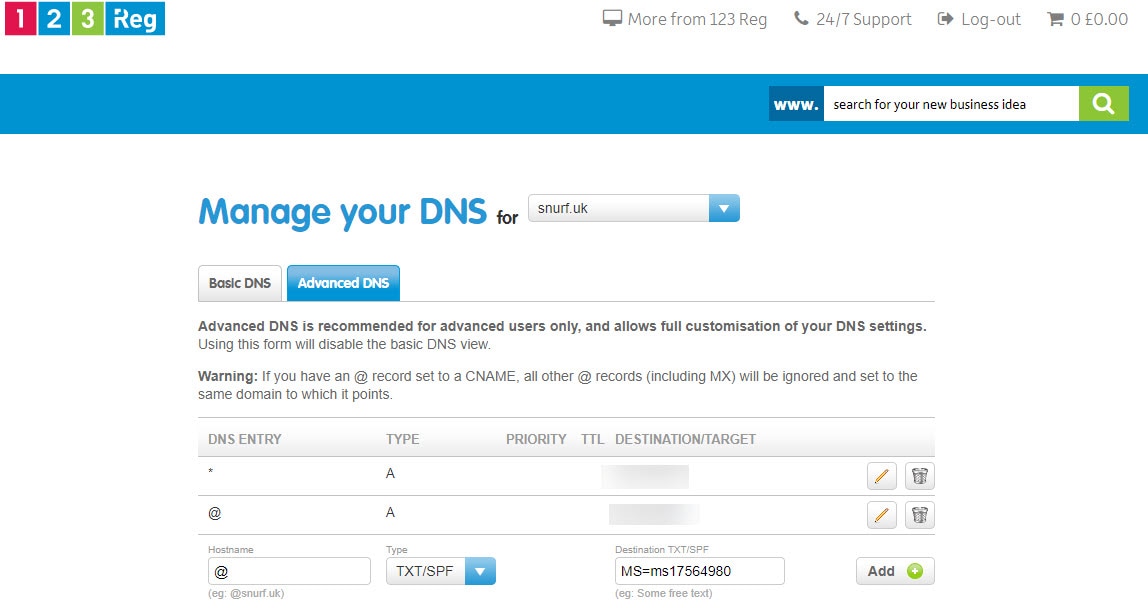
 On the 123-reg portal, it looks like this. It’ll be similar for your DNS hosting provider.
 Once the DNS record has been added, click Verify the Domain, and with any luck, you should see a congratulations message.
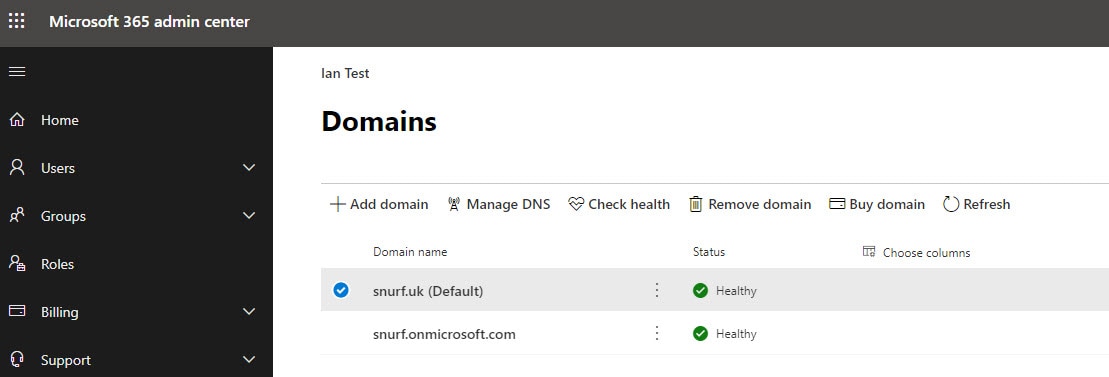
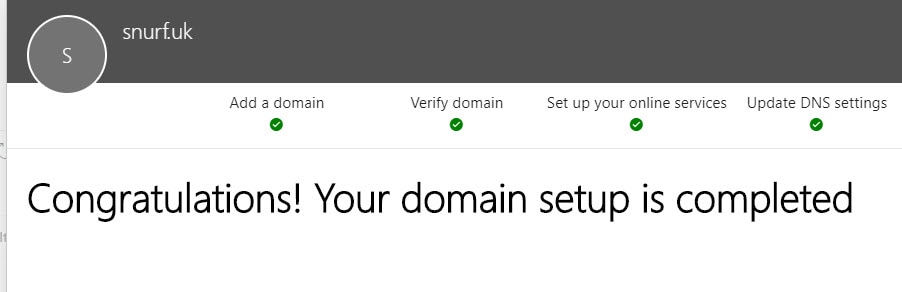 We now have a new verified domain.
User Creation
There are a couple of ways to create users in an O365 portal. They can be synchronized from an external source like an on-premises Active Directory, or they can be manually created on the O365 portal. I’ll show the latter here. Click Users, Active users, Add a user. Notice snurf.uk is now an option for the domain suffix.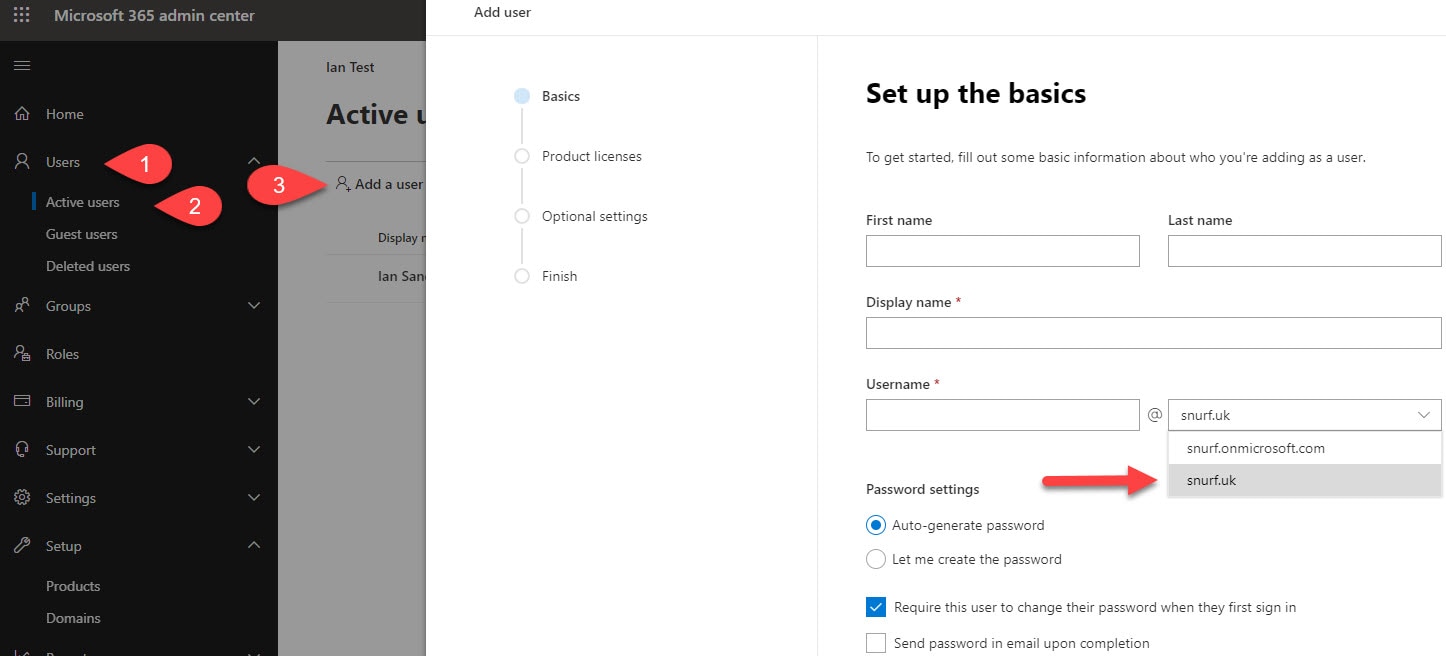 Fill in the user's name details.
 If you have any licenses available, assign them here. I didn’t have any licenses available for this environment.
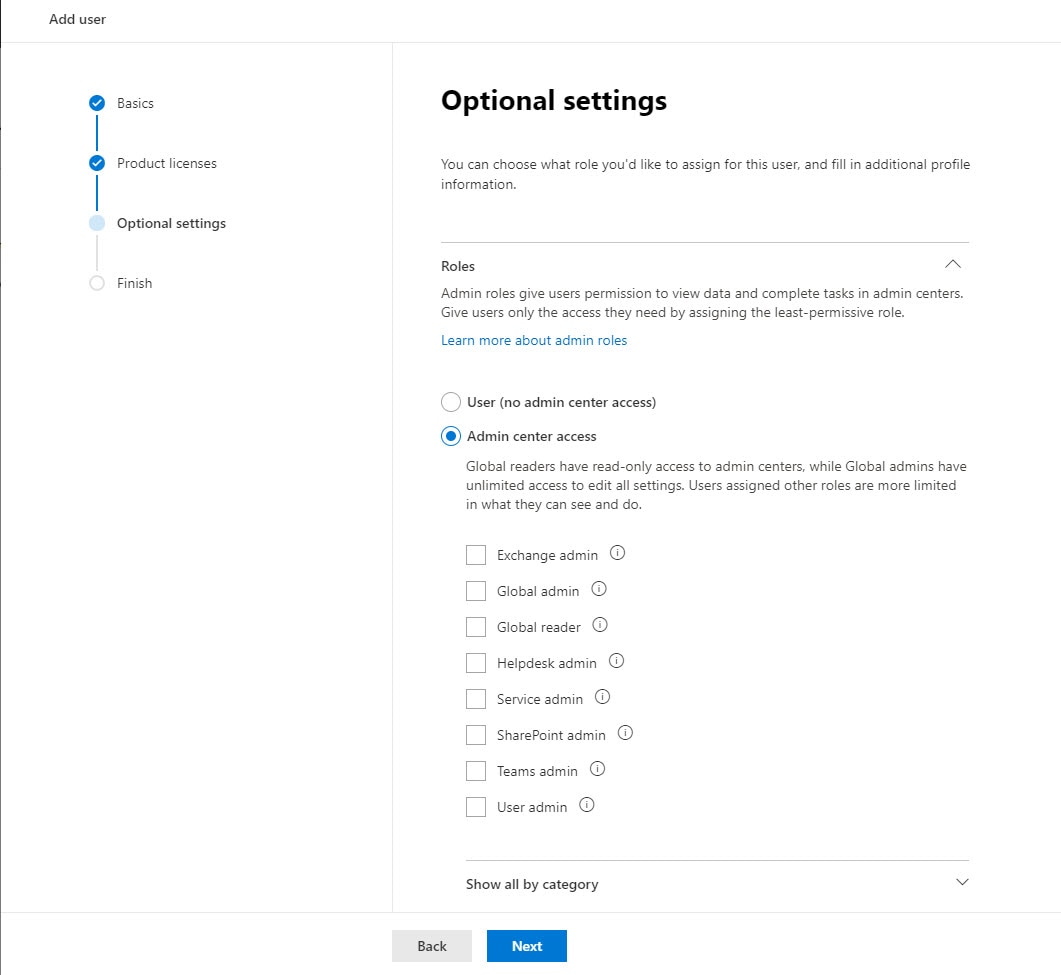
 Assign user permissions.
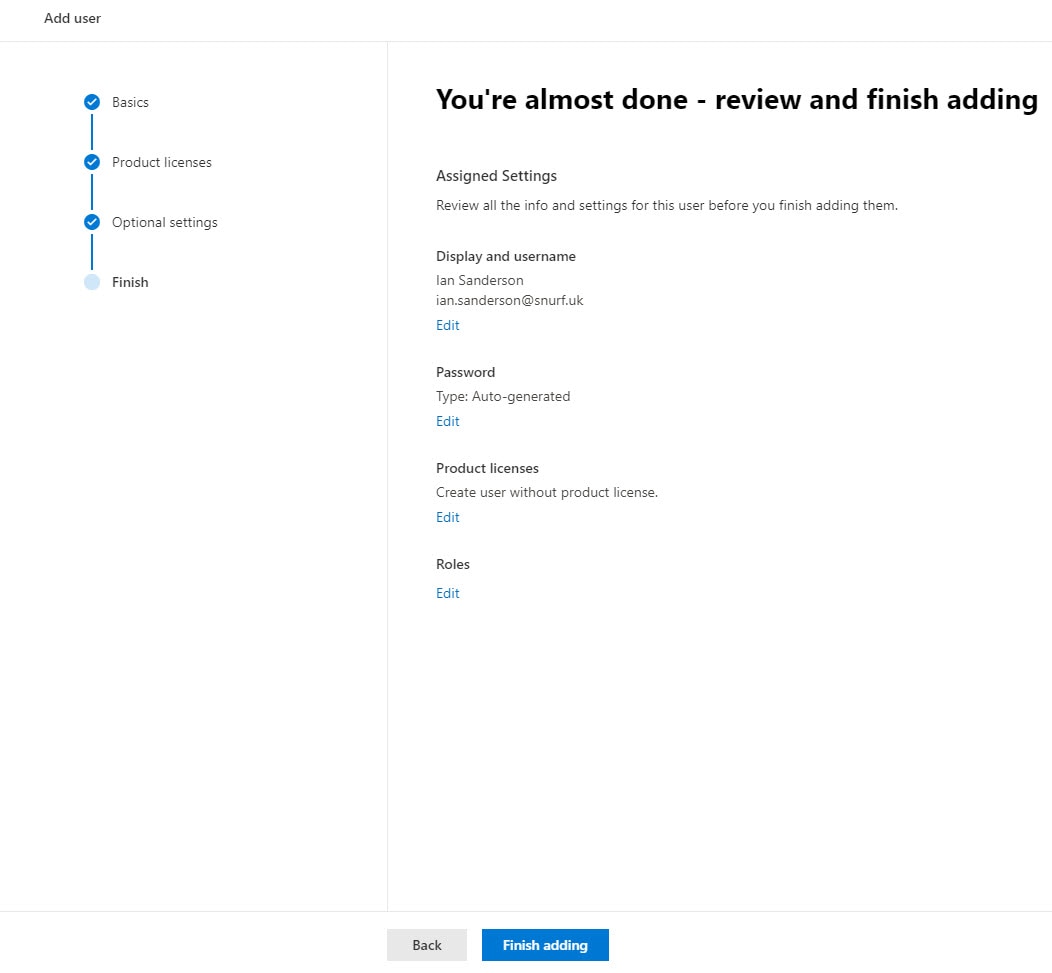
 And click Finish.
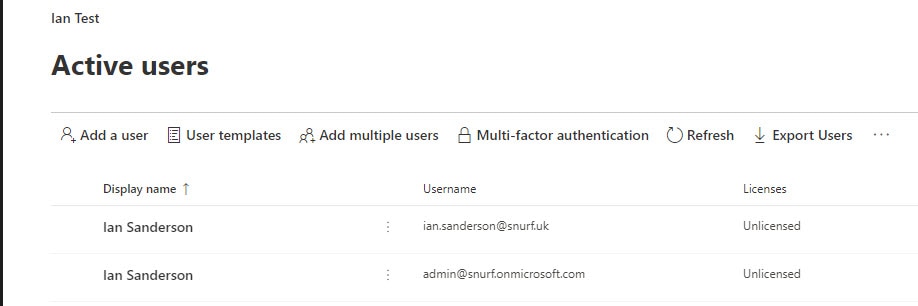
 You now have a new user.
Further Config
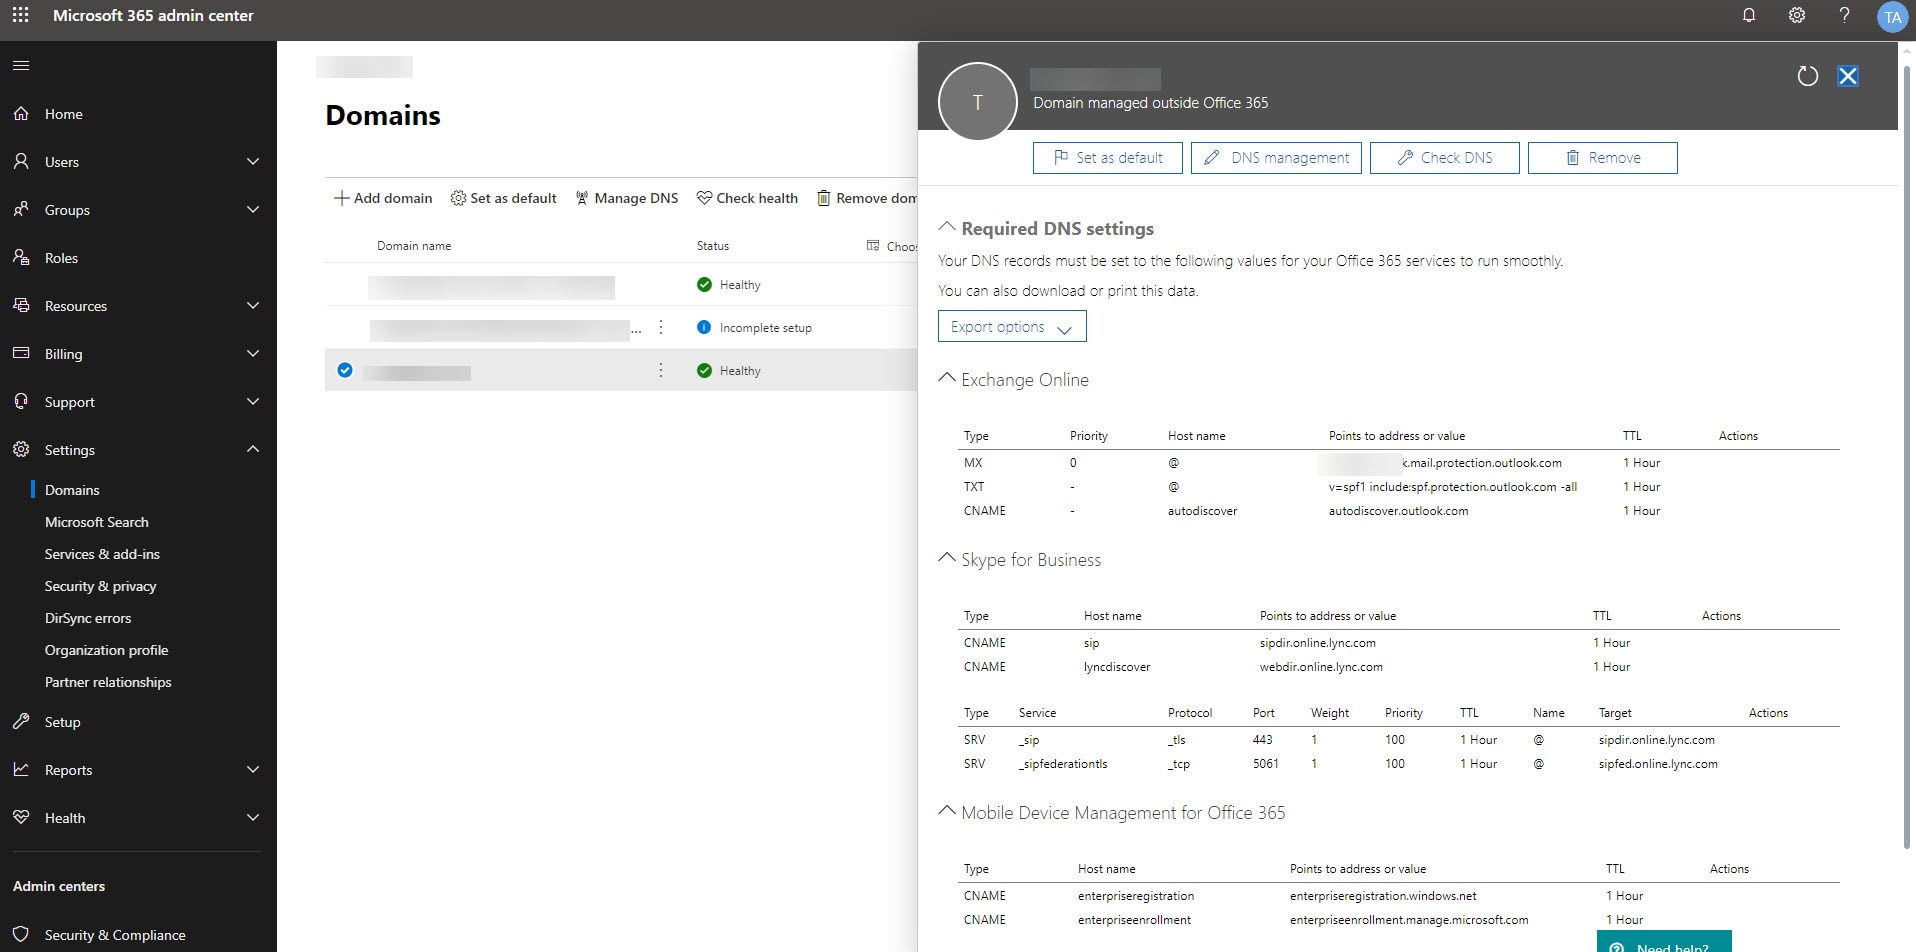
I’ve shared some screenshots from my organization’s setup below. Once you have some licenses available in your O365 portal including Exchange online, then there’s some further DNS configuration to put in place. It’s the same idea as above when verifying the domain, but the settings below are used to configure your domain to route mail via O365, amongst other things.
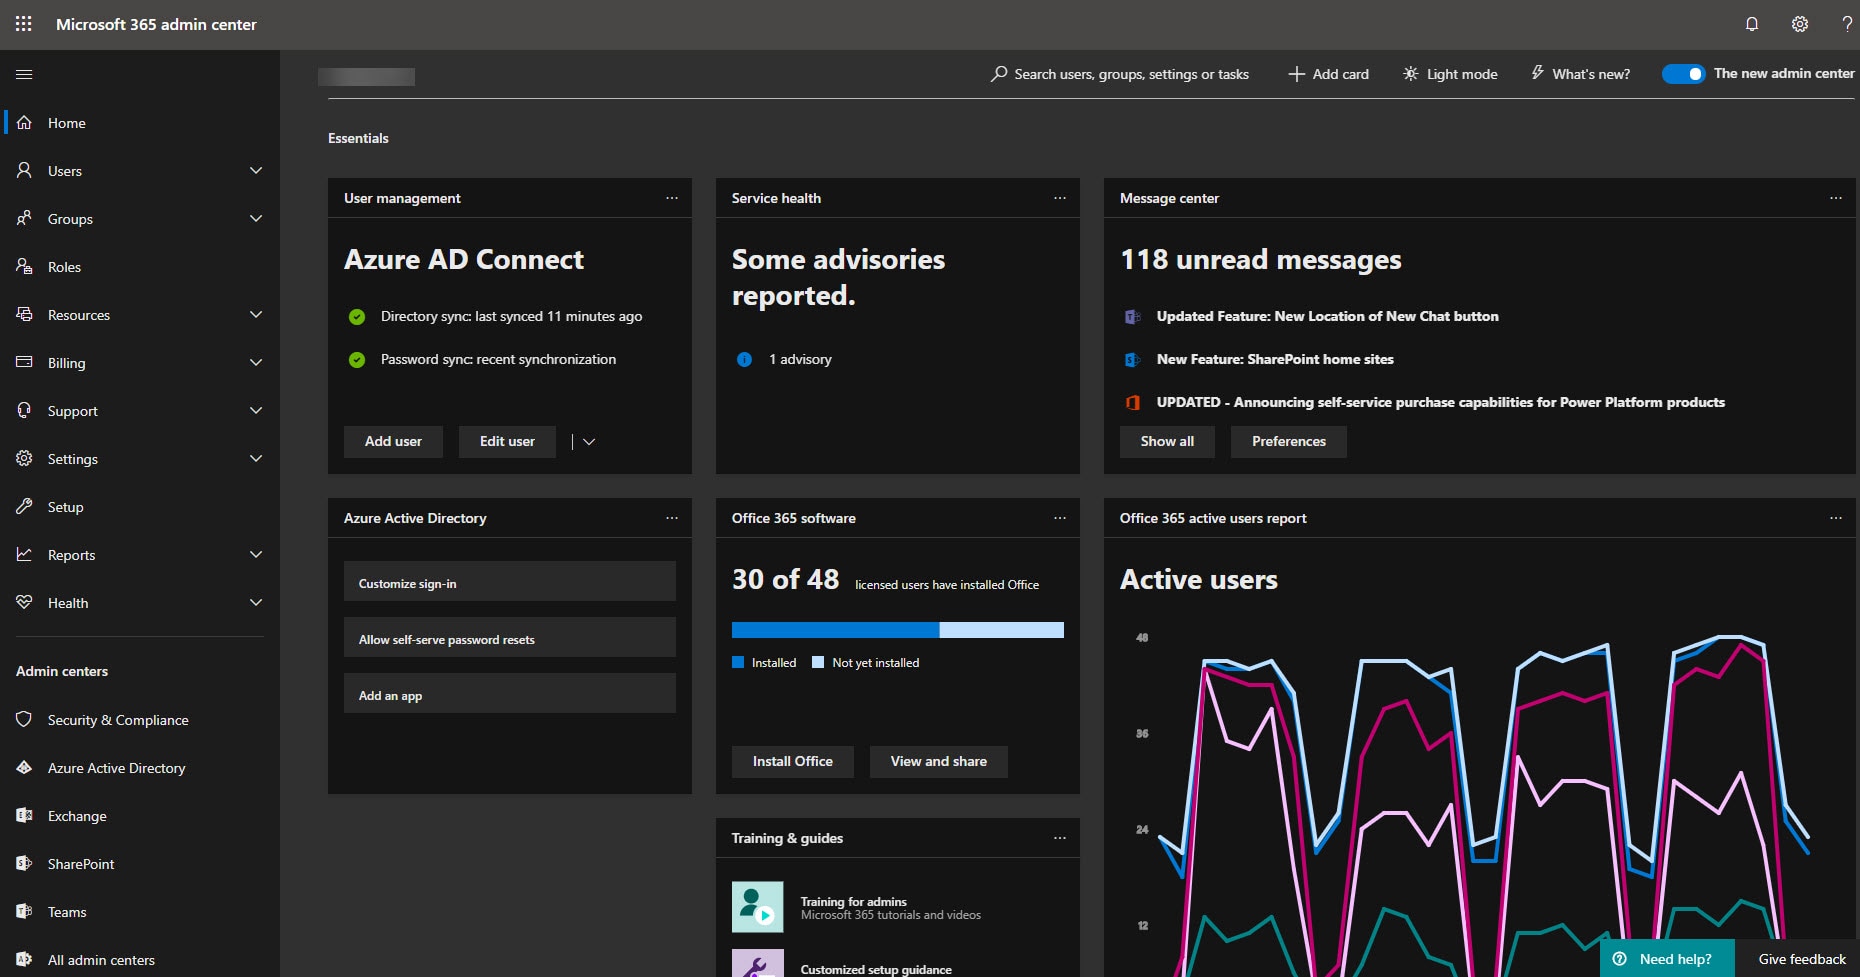
 Once all that’s in place, you’ll start to see some usage statistics.